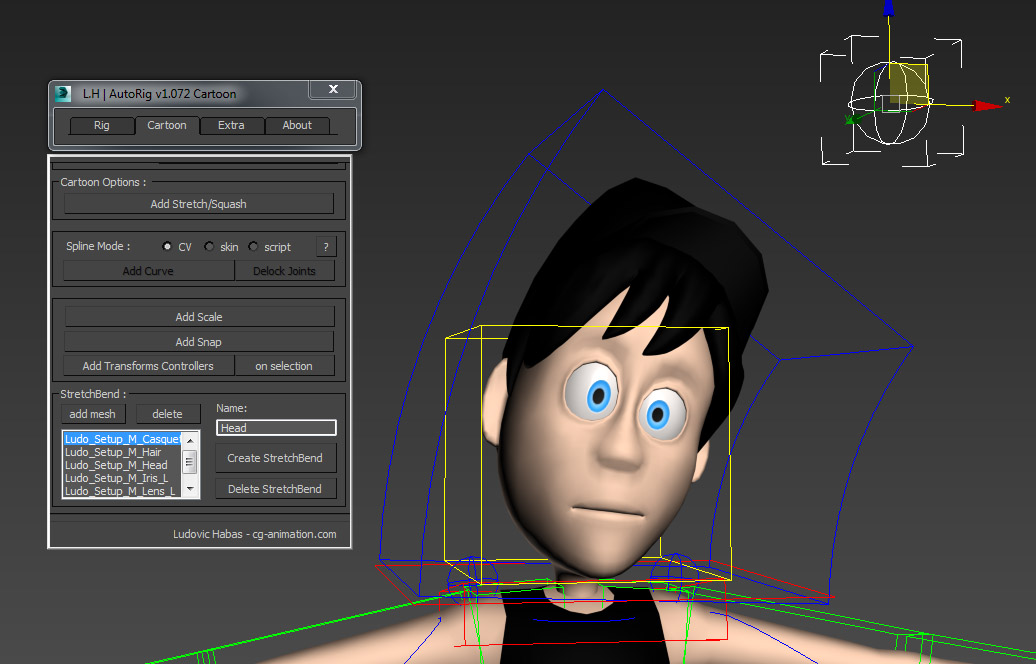
")
Cartoons options
Initialize
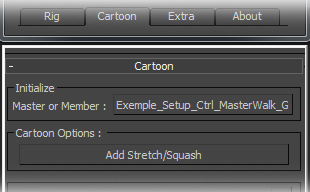 |
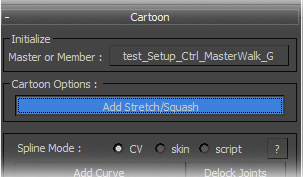
To add the "cartoons" options, the auto-rig has need to be initialized. It is possible to add "cartoons" options on a members or on all the rig. To add them on a specify member, pick his master shape. To add them on all the rig, pick the master general of the rig. |
|
|
|
Add stretch/squash
 |
|
|
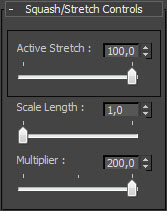
The stretch option allow to strech the members like an elastic. Once the cartoon menu initialize, just press on "Add Strech/Squash" to add the stretch option on the member or rig picked during the initialization. When the stretch option is added, a "Squash/Stretch Controls" menu is available on the master shape of the member or members picked. This menu allow to activate the stretch in IK, or set the stretch in FK and also to set the squash force.
|
Add curves members
 |
|
|
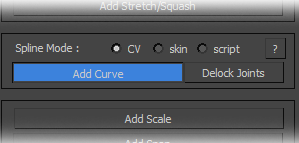
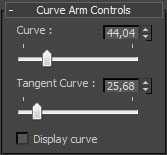
The curves options provide the ability to deform the members. Once initialized cartoon menu, simply click on "Add Curve" to add the curve system on the member or the rig picked during initialization. 4 systems of rig for the curves: "Fast CV", "CV", "Skin" and "Script". The system of curves "Fast CV" is the last system of rig, normally it's the most faster and with the better compatibility with different version of 3ds Max. When the curve system is added, a "Curve Controls" menu becomes available on the master shape of control of the member or or members picked. This menu allows you to adjust the value of the curves of the joint member and its tangents value. A checkbox can also display control shapes to customize and animate curves. Adding curves options allows to add "Delock Joints" option. |

Delock Joints
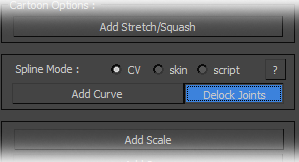 |
Once the cartoon menu initialized and options of curves added, you can add the possibility to animate the position of joints with this options 'Delock joints". |
|
This option will add an animation controller on each joints and the animator will be able to animate them. |
|
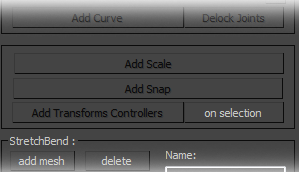
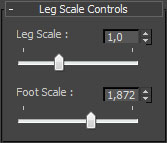
Add scale
 |
|
|
The scale option allow to enlarge or reduce the parts of a member. To add this option, once the auto-rig initialized, just press on "Add scale" to add the scale option on the member or the rig picked during initialization. When the scale system is added, a "Scale Controls" menu is available on the master shape of the member or members picked and allow to set the size of each part of member.
|
Add snap
|
Once the cartoon menu initialized, just press on "Add Snap" to add the snap system to the member or to the rig initialized. |
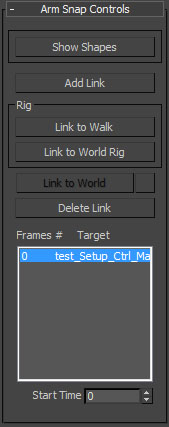 |
When the snap system is added, a "Snap Controls" menu is available on the IK shape on the member or on the members previously selected and allow to link/unlink the IK system of the member selected to any object during the animation. Add link: Link the IK system to the picked object at the current frame. |
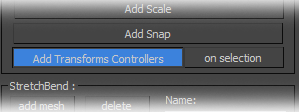
Add "Transforms" options
 |
|
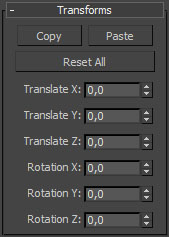
|
The "Transforms" options allow to view the values of transformations (positions and rotations) of the animation shape selected, to copy the values of transformations and paste them on an other animation shape or also to reset quickly the transformations of the animation shape. To add this option, once the auto-rig initialized, just press on "Add Transforms Controllers" to add a "Transforms" menu on the member or the rig picked previously during the initialization. The "Transforms" options can also be added on any personnal object or group of objects previously selected in pressing the "on selection" button. |
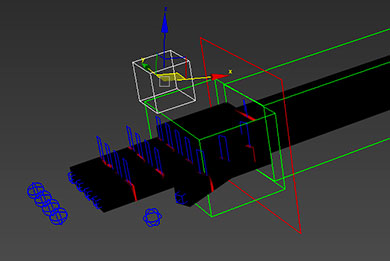
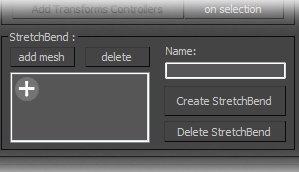
Stretch/Bend
 |
|
|
The StretchBend system allows to add on any geometries, even if they are already rigged or have modifiers, etc... an overlay of modifiers to strech, bend and/or twist them.
To add this overlay, the object or the group of objects must be added to the list of the script with the button "add mesh" after selected them. The system must be nammed with an unique name, then can be created with the "Create StretchBend" button. Attention, the "Limit Effect" option is not accessible by script so you should be checked this options by hand to the system work properly. A message recall it before the finalization of system.
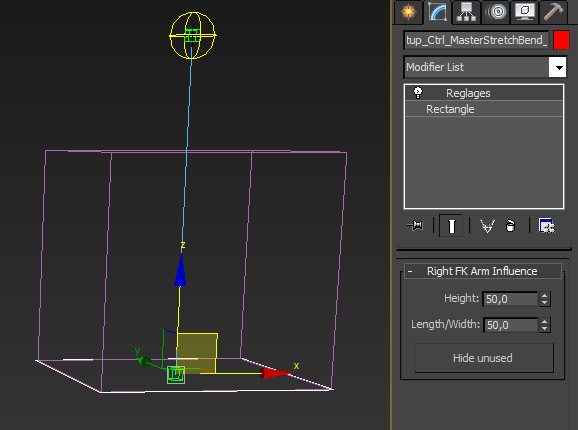
Once created, the box formed by the system must emcompass your object or group of objects to work properly. To set it, use the MasterStretchBend ( red shape created ) to position well the system and play with the values of height and of length/width to adjust its size. |