
")
Interface
Name
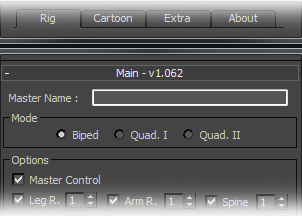 |
Name the rig is the first step to build it. "Master Name" will set the name of the future rig. Name this is obligatory. Namely, special characters are not allowed in the "Master Name". |
Mode
|
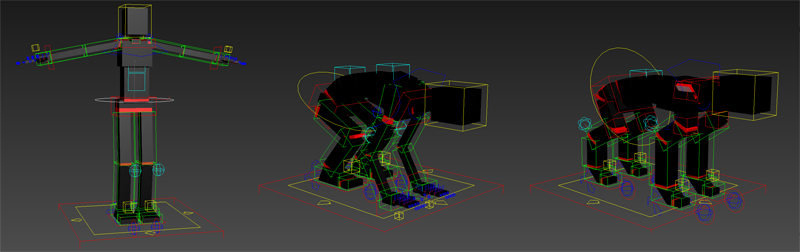
To simplify the placement of construction helpers, 3 modes of creation are available: "Biped", "Quad. I" et "Quad. II". |
3. The "Quad. II" mode is more suited to create animals/creatures character rigs without front members of type arms (horses, dogs..).
|
|
Options
 |
|
|
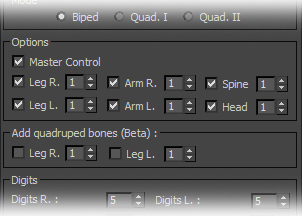
In this section, the user can set the desired number of members for the future rig . For the first generation , it is necessary to check " Master Control" to create a controller general to the rig. When you want to create just one member, for example, to complete a rig existing, it is not necessary to check this option. |
Quadruped bones
|
 |
|
To create quadrupeds rigs, it may be necessary to add bones to members to improve the rig. With "Add quadruped bones" options you can add to the chain of bones right and left legs these additional bones. |
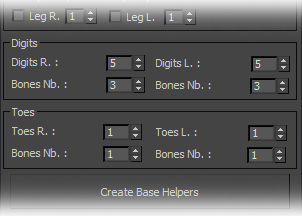
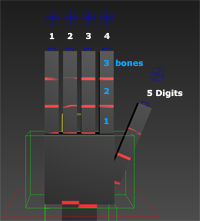
Digits/Toes
 |
 |
|
In this section of the auto-rig, the user can set the number of fingers to the hand and to the feet and the number of bones desired for each finger chain. |
Create Base Helpers
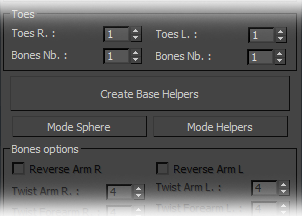 |
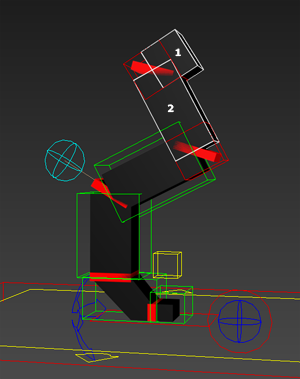
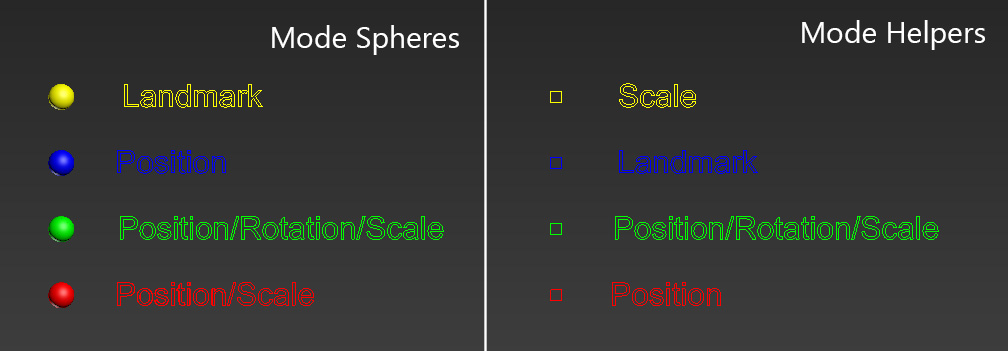
The creation of the "Helpers Base" is the first and essential step in the creation of the rig. It generates a first draft of the future rig with helpers. The helpers, once positioned on the joints of your character, will allow the system to generate future rig. Two display modes are available "Sphere Mode" and "Helpers Mode", the two modes are interconnected and do not change the final result, only how to place helpers differs. |
|
The mode choice is according to your preference. A legend helps to know how to place helpers basis of marks depending on the mode (see image above). Tips: For starters, it is advisable to adjust the overall size of the "Base helpers" with the general controller nammed "XXXX_setup_Ctrl_MasterControl_G." Then each member of "Base helpers" has one helper/sphere master, spotted by their green color, to place in second time. Then, the red, blue and yellow helpers/spheres let completely adjust the rest of "Base helpers". Namely:
|
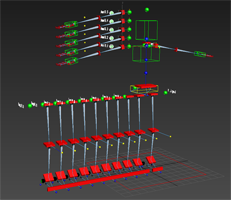
Bones options
 |
In this part, you will be able to set the number of bones for each member. A high number of bones improves the rendering of twists and cartoons options (curves and stretch) but will more complicated to skin and will use more ressources. The reverses options should be checked when the joints move in the opposite direction relative to the direction of the common human joints, eg to rig a flamingo. The reverse option will prevent the bones flip when finalizing the rig. |
Create a preview rig
 |
During the work of placement of the base helpers, the "create preview rig" button gives you the opportunity to see a quick preview of the future rig. This step is required before finalizing the rig. |
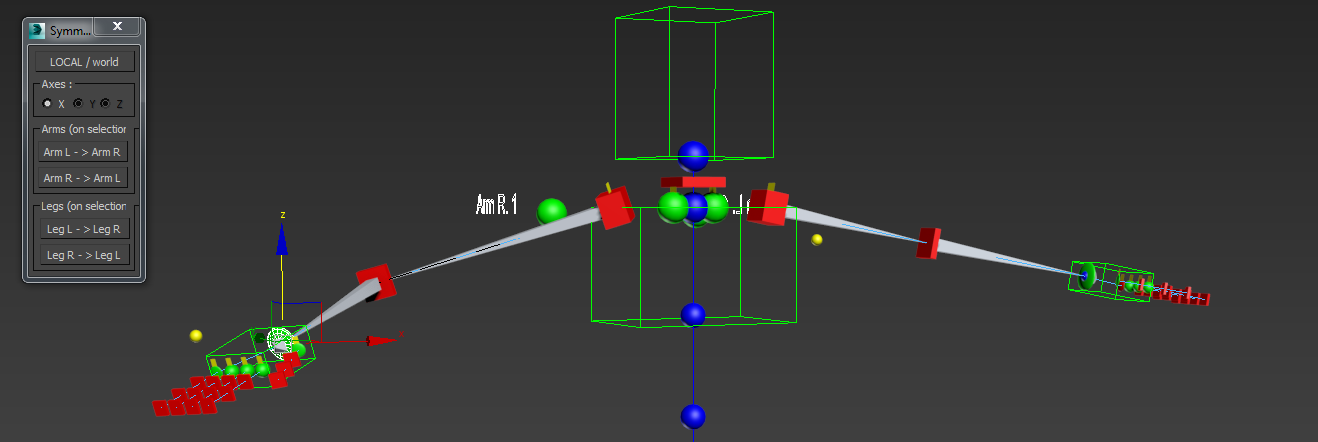
Symmetry
|
To facilitate the creation of the "base helpers", the auto-rig has options of symmetry. To make a symmetry of a member, open the symmetry module, select a helper/sphere of member as you want symmetrized and make the symmetry in the direction as you want with the appropriate buttons. |
|
|
Save/Open rig
|
Use the Save and Open button to save a base helpers or load a base helpers. It is highly recommended to save the base helpers before finalizing a rig, it will quickly regenerate the rig when needed . Namely, the creation of a rig can be paused and resumed at any time. Simply, save the current scene in the state then restart the scene and the script to resume yout work. The auto-rig will automatically resume to the state of the backup to finish the rig. |
Rig options
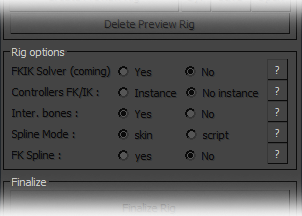 |
The rig options allows to add or to delete some functions to rig:. |
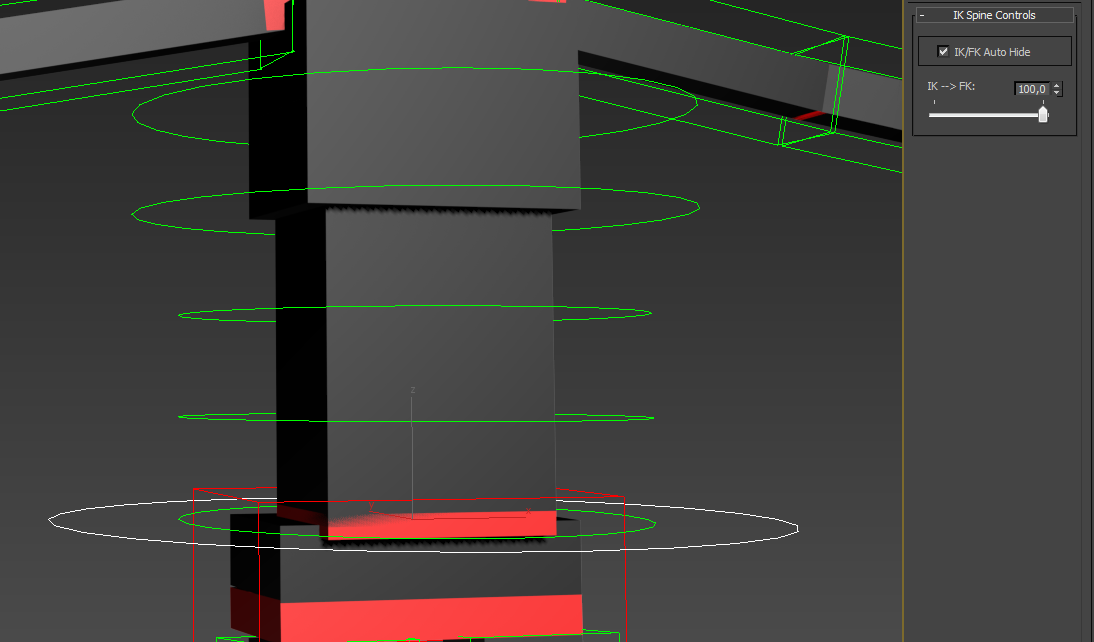
Controllers FK/IK: in "Instance" mode, the IK/FK control parameters will be added on each animation controller with the advantage of being more faster attainable. In "No body" mode the parameters will be placed only on masters of the member and allows to not mix the animation keys and key IK / FK transitions.
|
FK Spines: add a FK animation system to the spine.
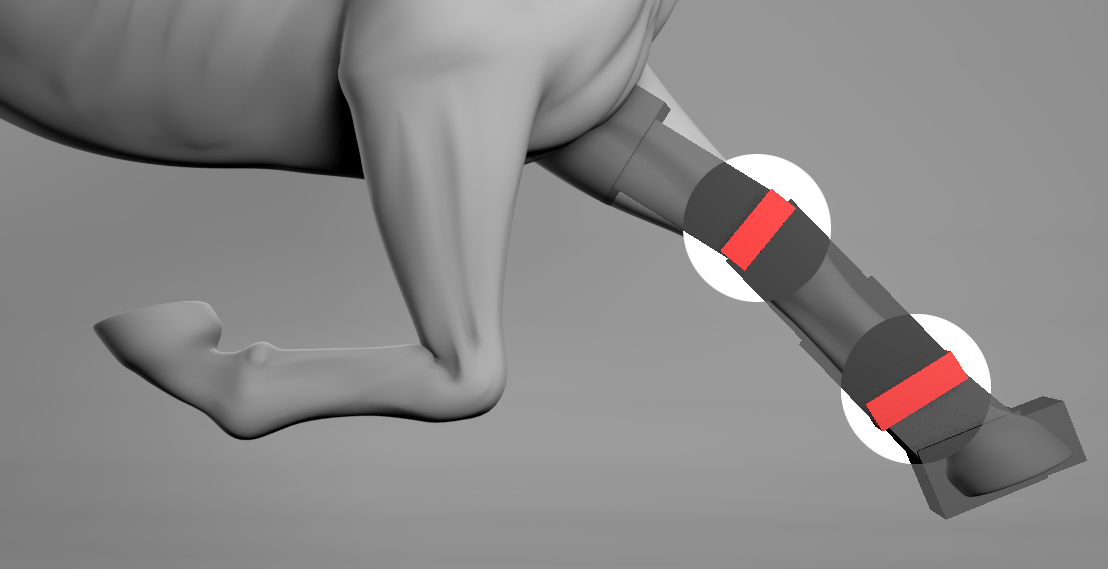
Inter. bones: Intermediate bones can improve skinning in the joints and avoid the use of a maximum skin that quickly morph increasing red scene (see the image below).
|
Finalize
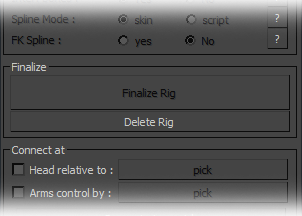 |
The finalization is the last step in the creation of the rig. The auto-rig will generated the rig depending on the placement of base helpers previously defined. Once the rig finalized it is no longer possible to change the rig without regenerating a new base of helpers. |
|
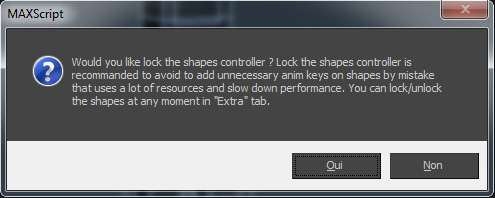
At the end of the finalization, it's possible to lock all the animation controller shapes to avoid to add useless animation keys on them and to slow down the scene. |
Delete rig
|
"Delete rig" to remove a rig easily. With this method, however, it is important to enter the name of the rig in the edit text "Master Name". |