")
Installation
Download the .exe file for your version of 3ds Max (there is a link in the email that we have sent you or in your space "My download" on the site). Once launched, select the root folder of 3ds Max, then follow the procedure to install LH | Auto-Rig.
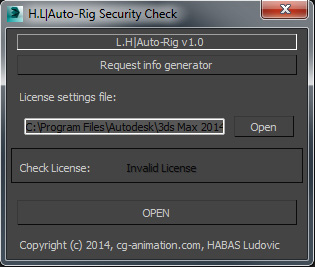 |
Then, the following window will open indicating that there isn't the license. To obtain the license, you will need to send us a little text file with some information. To do so, click on "Request info generator". |
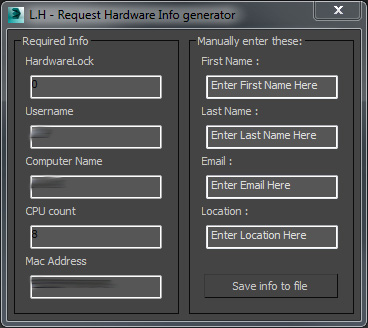 |
The following window will open with several text fields to fill. Once filled with your information, click "Save to file info." The script will generate and save a .txt with your information that you will have to return to us at the following address:This email address is being protected from spambots. You need JavaScript enabled to view it. You will receive in 48 hours maximum, your license. Then, you just copy and paste the license file in the Script folder of 3ds Max. |
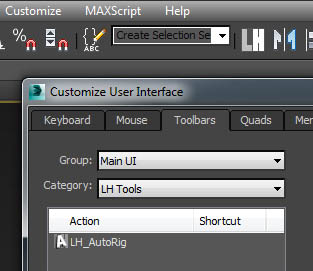 |
Then, to access to LH | Auto-rig, go Cutomize -> Customize user interface -> Toolbars -> Category: LH Tools -> LH_AutoRig then drag-and-drop it into one of your toolbars. |
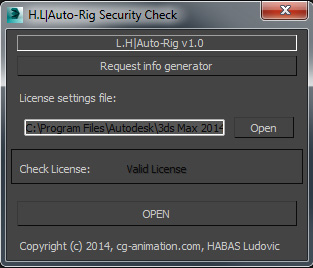 |
Once launched, "Valid license" will be displayed on the interface and you can launch the auto-rig (if this is not the case, please, contact us by the forum or with this address: This email address is being protected from spambots. You need JavaScript enabled to view it.). |
No questions yet.
Introduction
What is LH | Auto-Rig?
The LH|Auto-Rig is a semi-automatic system to create rig biped, quadruped or multi-member, realistic or cartoon for 3ds Max.
Semi - because the user must set up landmarks, later called "base helpers" to indicate the position and size of joints to the rig system.
Automatic, because the rig is automatically created by the system based on the options chosen by the user in function of this "base helpers".
The system is compatible with all versions of 3ds Max from 3ds Max 2011. After generating rig, there need any plugin for that it works. The rig can be used on any machine with 3ds Max or renderfarm.
Features
17/04/2016 - LH| Auto-Rig v1.095
- Fixed a bug with the skin pose button.
25/01/2016 - LH| Auto-Rig v1.093
- Fixed a bug with 3ds Max 2016
- Fixed a bug with the "delete rig" options
- Fixed a bug with symmetry of FK Chain
24/01/2016 - LH| Auto-Rig v1.092
- Fixed a bug with Transforms cartoon options
- Fixed an interface bug when the 3ds max scene is reset
- Fixed a bug with the animaiton layers and FootRoll Controls
20/01/2016 - LH| Auto-Rig v1.09
- Add compatibility with the 3ds Max Animation Layers.
- Fixed a bug with the FK chain symmetry.
- Fixed a bug of display with IKFK hide.
- Fixed some duplicates names problems.
- Fixed a bug with some particular configuration of setup which not worked.
- Fixed the size of some controllers and helpers which the rig is scaled.
02/10/2015 - LH| Auto-Rig v1.084
- fixed a bug of twist of bones with the upperarm.
16/09/2015 - LH| Auto-Rig v1.083
- simplification of the autohide system because it caused slowdown.
24/08/2015 - LH| Auto-Rig v1.082
- fixed a flip problems on the twists of the legs.
- fixed a bug of neck axes in quadruped mode.
- fixed a bug of axes on the quadrupeds legs in quadruped mode.
- fixed a duplicate name in quadruped mode.
- fixed a bug of name on the StretchBend system.
- fixed a bug of slowdown with the autohide system.
12/07/2015 - LH| Auto-Rig v1.081
- new twist system for arms and thighs, flip problems fixed.
- new system for quadrupeds bones.
- fixed same name convention problems.
- added "key all" and "delete keys" buttons
- fixed neck axes.
12/04/2015 - LH| Auto-Rig v1.08
- compatibility with 3ds Max 2016
- add symmetry tool
- add system to add any objects on the rig objects list.
- new system of spine, more faster, no freeze in the trackView.
- new system of shoulder
- fixed duplicate names
- fixed a bug of the neck
- fixed a bug of the deleted rig
- changed the color of the bones for better visibility
- changed the form of the controller for better visibility
cartoon options:
- fixed the posiiton of the master controller of the stretchBend
26/01/2015 - LH| Auto-Rig v1.072
- fixed name convention of digits end
- fixed little bug with rename tool.
- add toLower and toUpper options on the rename tool.
- fixed bug with delete rig options
- add mirrors options for FK chain
cartoon options:
- add snap options for the master
- fixed the delete link on snap options
15/12/2014 - LH| Auto-Rig v1.071
EDIT: 15/12/2014 13h30 - Fixed a bug with the spine when units are differents of centimeters in CV mode.
- fixed bad name of some objects
- better "connect at" (fixed the no link of some objects) and add little help.
- add tooltip and undo on the symmetry tool
- fixed the "restore the old name rig version" on the rename tool for digits and palms.
- fixed scale of the FK chain.
- better compatibility with max in others languages that english
07/12/2014 - LH| Auto-Rig v1.07
- better compatibility with 3ds Max 2015
- fixed a display bug when no keep the frame 0 on 3ds Max 2015
- better spine and curves
- Add interactive auto-hide for IK/FK
- Add undo on FK/FK options
- fixed a bug of display of stretch on FKChain
- change the form of the maters for more visibility
- add messages and options to lock/unlock the shapes
For cartoon rig:
- add scale paramaters on the StretchBend
- add option to limit the StretchBend
- fixed bug on the StretchBend
13/11/2014 - LH| Auto-Rig v1.062
- unlock all the shapes controllers when you generate a rig.
- add functions in extra tab to unlock or lock the shape controller manually.
For cartoon rig:
- add function to add manually the "Transforms options" on a controller selected.
05/11/2014 - LH| Auto-Rig v1.061
- little correction on the symmetry tool.
04/11/2014 - LH| Auto-Rig v1.06
- Fixed the auto-shoulder flip.
- Fixed the scale of digits
- Added option to add a FK Spine
- Added an option to make the shoulders completely independent compared to movements of the pelvis .
24/09/2014 - LH| Auto-Rig v1.051 12h00
- Corrected the names of digits helpers
- Fixed the "restore the old name rig version" on the renameTool
24/09/2014 - LH| Auto-Rig v1.05 00h30
- Fixed a critical bug with spine, neck and curves that cause lag.
- fixed a bug in particular positions with the foots
- prepare to IKFK solver by Felix joleanes for the next update
- added a better footroll
- added help buttons
07/09/2014 - LH| Auto-Rig v1.042 14h30
- Fixed a bug when the rig is generated in a hidden layer.
For cartoon rig:
- added delock joints
- Fixed a bug with scale and curves on the same rig.
- big optimization of curves.
- fixed the name of cartoons objects
02/09/2014 - LH| Auto-Rig v1.041 21h30
- Fixed a bug on the spine
- Fixed an error message that appears sometimes when opening 3ds Max with the rig.
- Fixed a bug with delete rig button
- added function to delete intermediate bones
- locked anim tracks no used on the shapes controllers.
- fixed display bug when the auto-rig generete a rig.
31/08/2014 - LH| Auto-Rig v1.04
- compatibility with 3ds Max 2015
- added quadrupeds bones
- added toes rig
- added tool for rename the rig
- coherent names for object of rig
- added spring options for FK Chain
- added instance options for FK/IK controllers
- fixed bug with the neck
- fixed bug with swivel align
- rig performance optimization
For cartoon rig:
- add transforms controllers options
04/06/2014 - LH| Auto-Rig v1.03
EDIT: 04/06/2014 23h30 - Fixed a bug with the delete StrechBend
- added intermediate spine bone
- fixed the parenting of bones to export correctly with LH|FbxExport
- reduction and optimization of the tool window
- added corrected stretch on FK chain
- fixed bug with auto-clavicle
- fixed bug when there is only one bone on the arms
- Rig performance optimization
- fixed compatibility with 3ds max 2012 without service pack
- IK bones renamed as helper to facilitate skin bones selection
- added error message for symmetry helpers when no helper is selected
- compatibility with next update of ChracterTool and SaveAnimTool
- fixed bug with the installer and Browse... option
For cartoon rig:
- added StretchBend system
- fixed bugs when add cartoon options with character not in skin pose.
- fixed bug when add cartoon options with quadruped
- fixed bug of scale with the curves option
08/03/2014 - LH| Auto-Rig v1.02
EDIT: 09/03/2014 11h30 - Fixed a bug on MasterControl that is refocused on the world center when the rig is finalized.
- added a save/open system for the set helpers
- fixed a bug when scale the set helpers
- added directionnal helpers for shoulder
- changed sphere to box for size helpers
- added a intermediate bones for the spine.
- added a shortcut in extra for the LH | Auto-Skin
- fixed a name bug for the master control.
For cartoon rig:
- fixed a bug with addscale
- fixed a bug with addstrech
18/02/2014 - LH| Auto-Rig v1.01
- automatic load the license
- fixed a bug with skin pose.
- added information message when the user finalize rig without name.
Interface
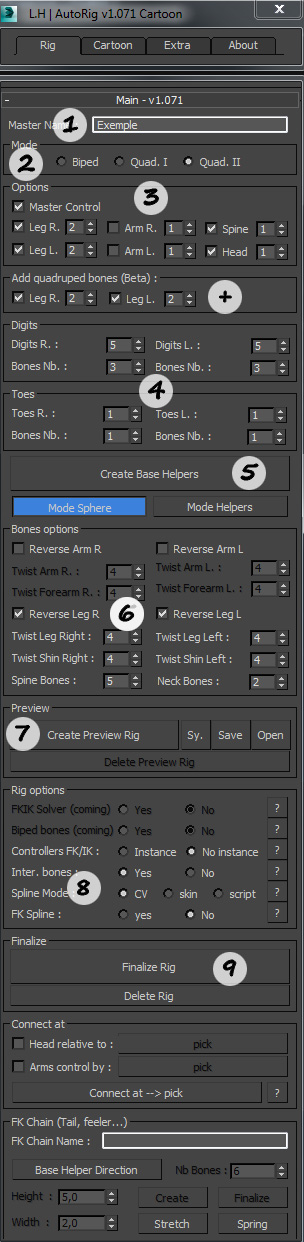
Name
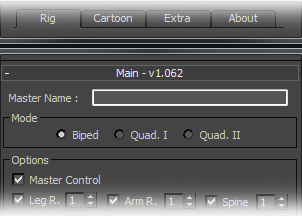 |
Name the rig is the first step to build it. "Master Name" will set the name of the future rig. Name this is obligatory. Namely, special characters are not allowed in the "Master Name". |
Mode
|
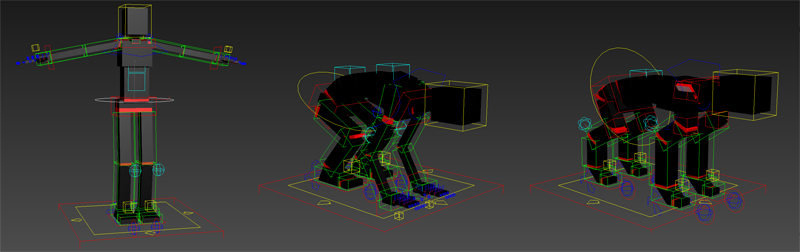
To simplify the placement of construction helpers, 3 modes of creation are available: "Biped", "Quad. I" et "Quad. II". |
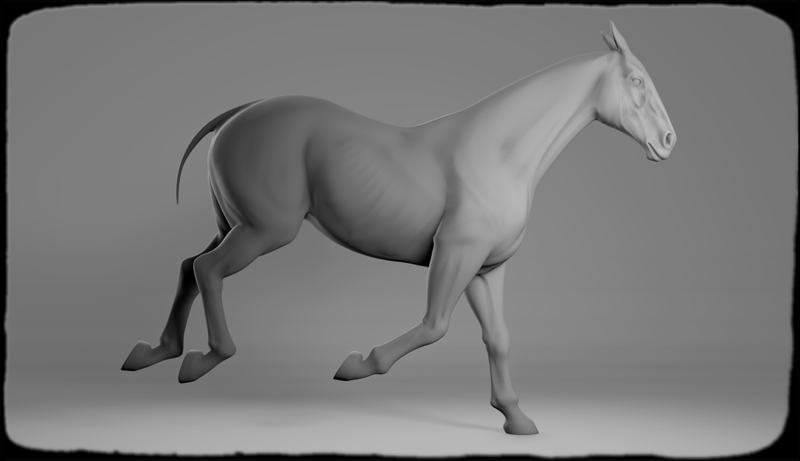
3. The "Quad. II" mode is more suited to create animals/creatures character rigs without front members of type arms (horses, dogs..).
|
|
Options
 |
|
|
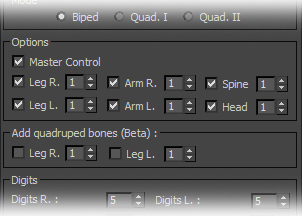
In this section, the user can set the desired number of members for the future rig . For the first generation , it is necessary to check " Master Control" to create a controller general to the rig. When you want to create just one member, for example, to complete a rig existing, it is not necessary to check this option. |
Quadruped bones
|
 |
|
To create quadrupeds rigs, it may be necessary to add bones to members to improve the rig. With "Add quadruped bones" options you can add to the chain of bones right and left legs these additional bones. |
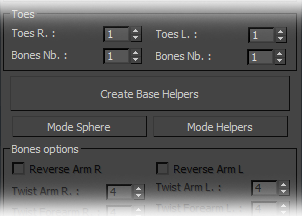
Digits/Toes
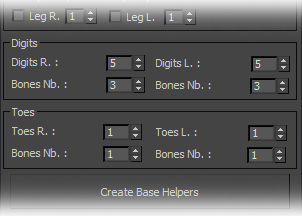 |
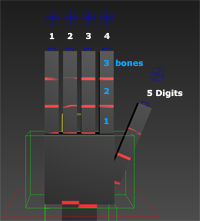 |
|
In this section of the auto-rig, the user can set the number of fingers to the hand and to the feet and the number of bones desired for each finger chain. |
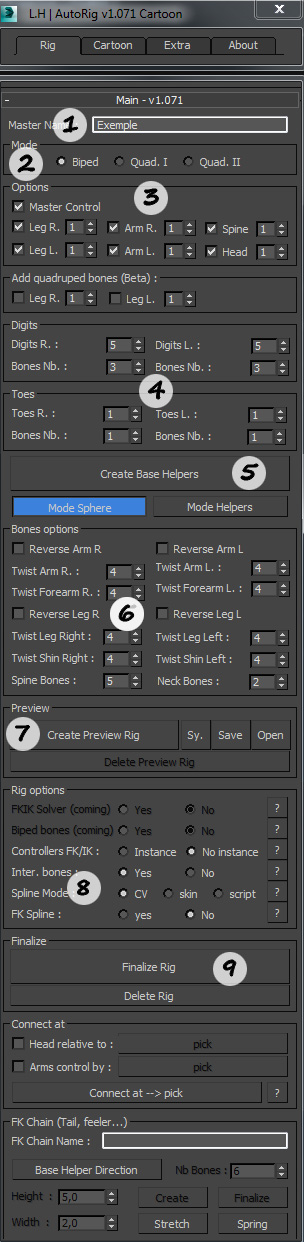
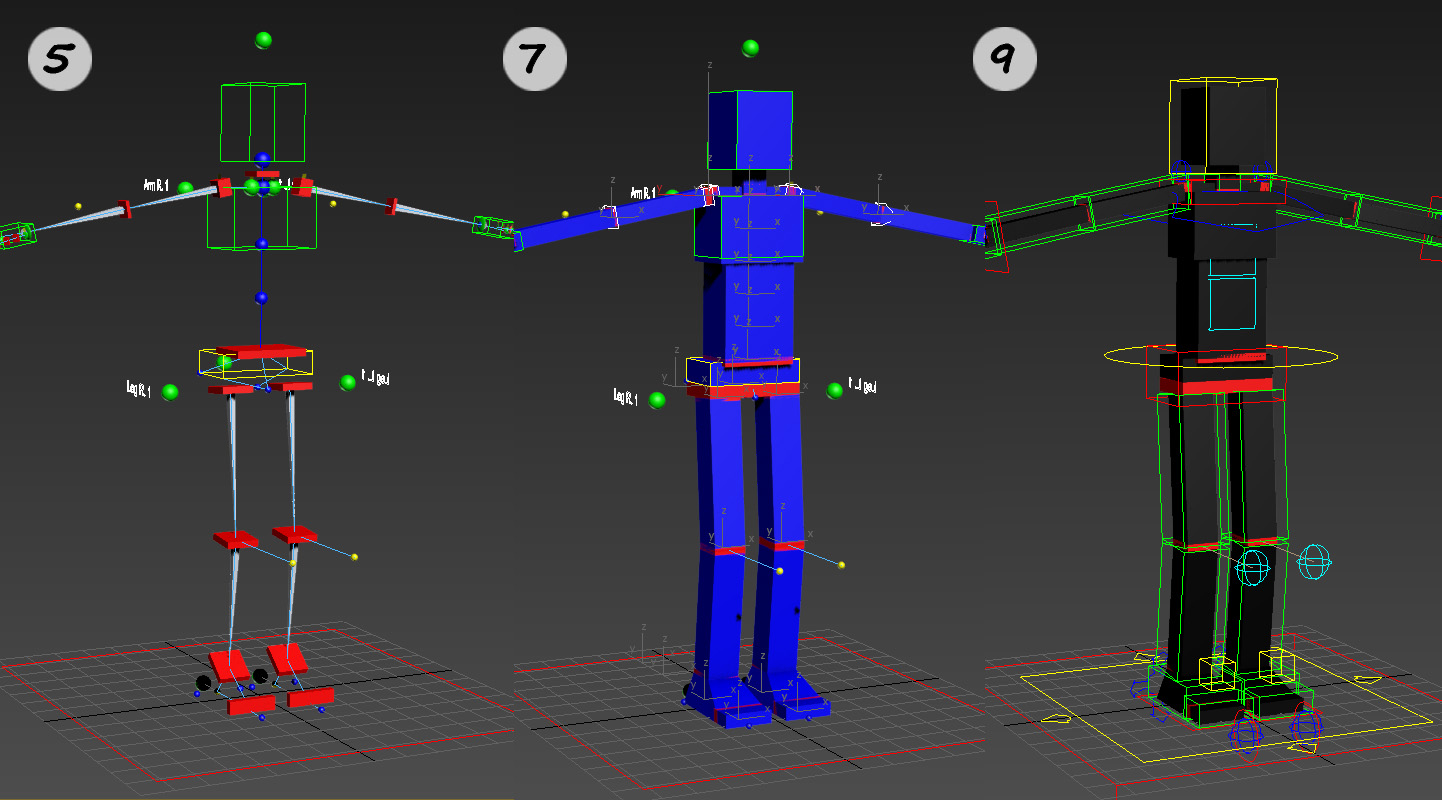
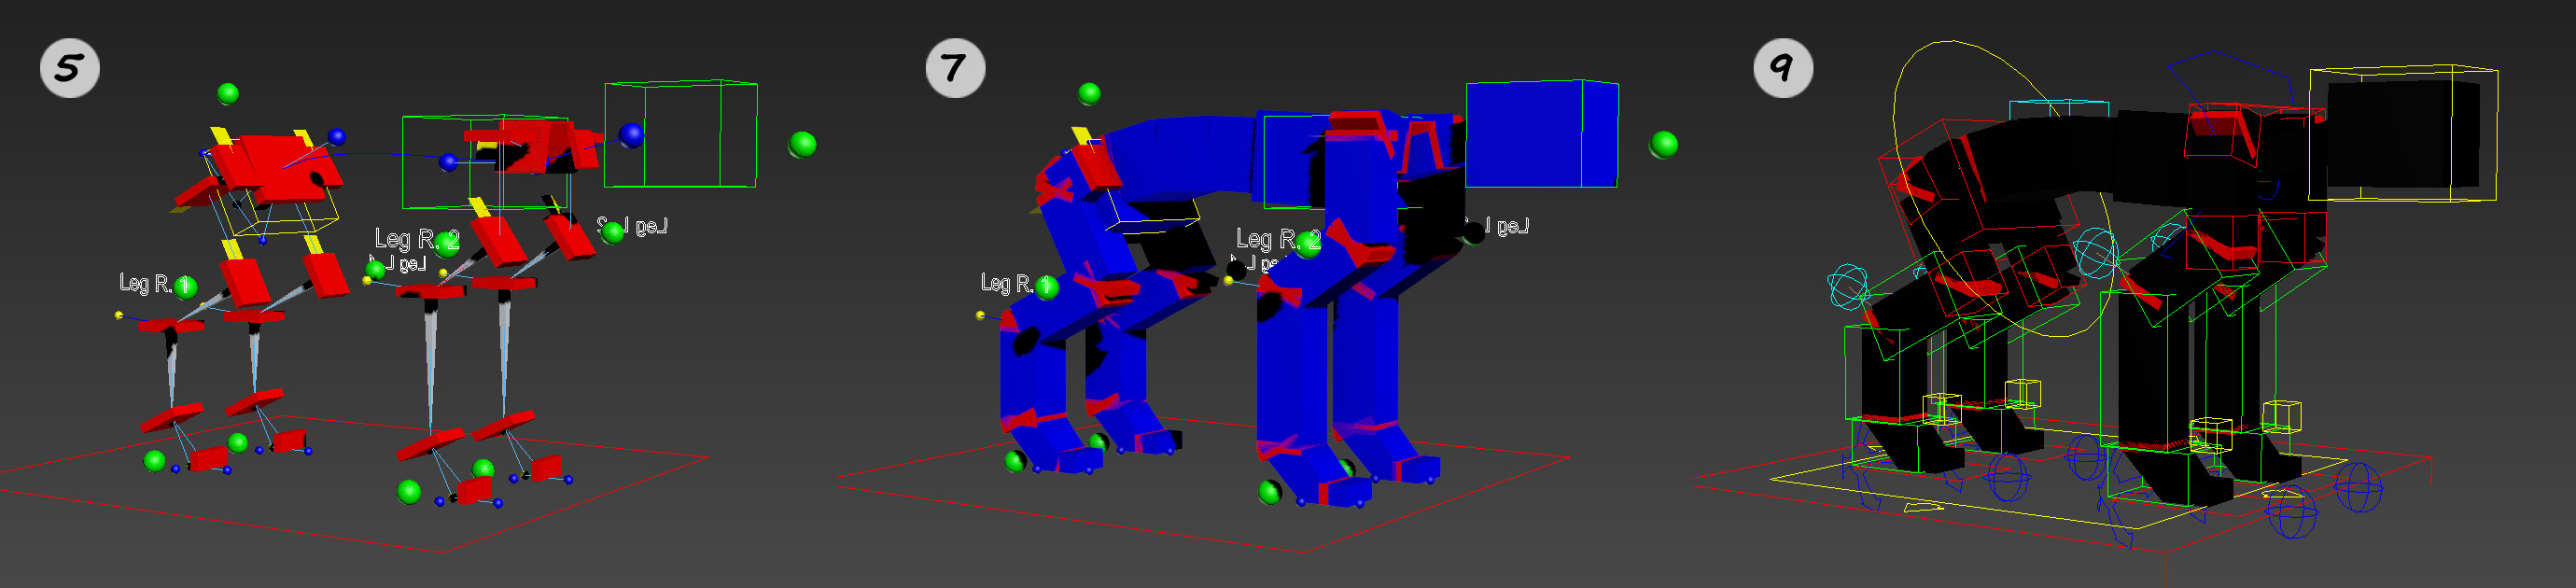
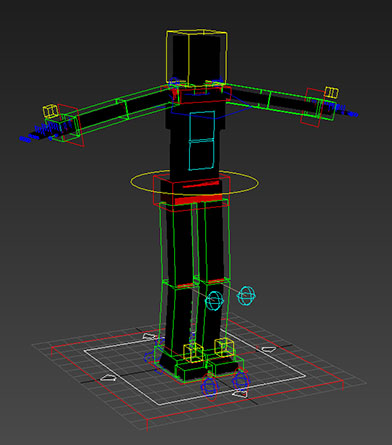
Create Base Helpers
 |
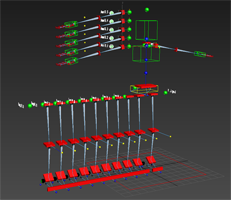
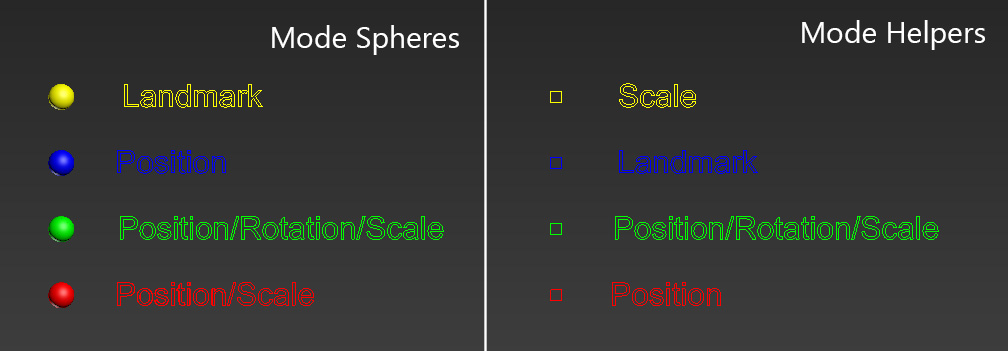
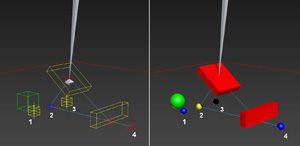
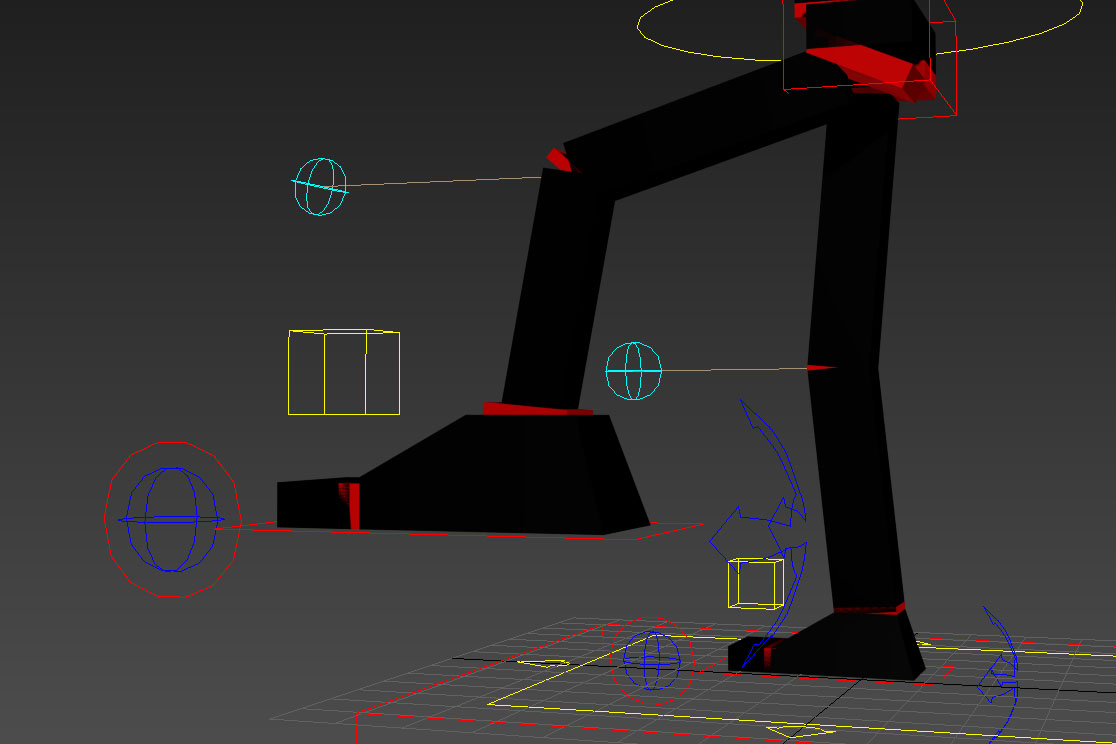
The creation of the "Helpers Base" is the first and essential step in the creation of the rig. It generates a first draft of the future rig with helpers. The helpers, once positioned on the joints of your character, will allow the system to generate future rig. Two display modes are available "Sphere Mode" and "Helpers Mode", the two modes are interconnected and do not change the final result, only how to place helpers differs. |
|
The mode choice is according to your preference. A legend helps to know how to place helpers basis of marks depending on the mode (see image above). Tips: For starters, it is advisable to adjust the overall size of the "Base helpers" with the general controller nammed "XXXX_setup_Ctrl_MasterControl_G." Then each member of "Base helpers" has one helper/sphere master, spotted by their green color, to place in second time. Then, the red, blue and yellow helpers/spheres let completely adjust the rest of "Base helpers". Namely:
|
Bones options
 |
In this part, you will be able to set the number of bones for each member. A high number of bones improves the rendering of twists and cartoons options (curves and stretch) but will more complicated to skin and will use more ressources. The reverses options should be checked when the joints move in the opposite direction relative to the direction of the common human joints, eg to rig a flamingo. The reverse option will prevent the bones flip when finalizing the rig. |
Create a preview rig
 |
During the work of placement of the base helpers, the "create preview rig" button gives you the opportunity to see a quick preview of the future rig. This step is required before finalizing the rig. |
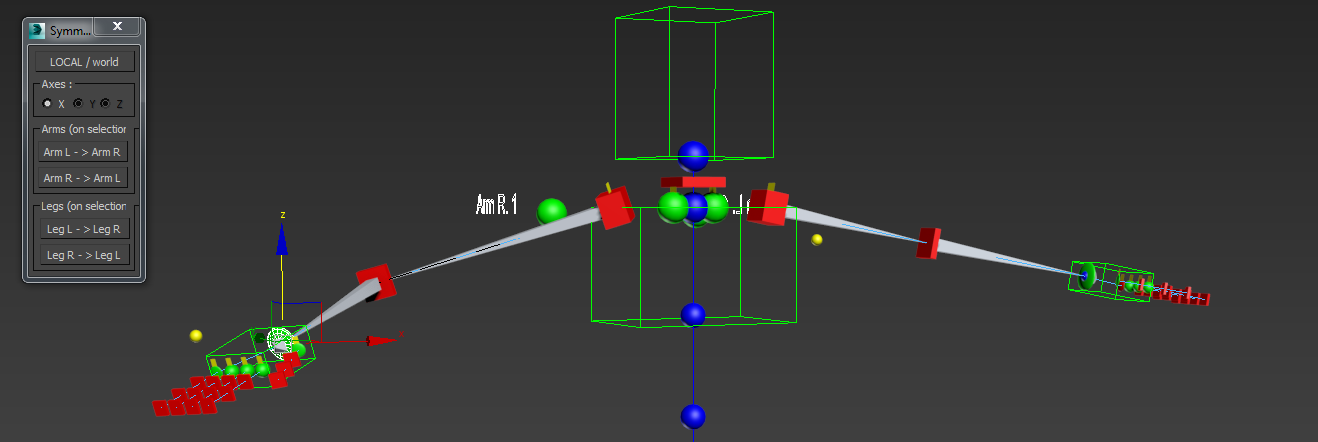
Symmetry
|
To facilitate the creation of the "base helpers", the auto-rig has options of symmetry. To make a symmetry of a member, open the symmetry module, select a helper/sphere of member as you want symmetrized and make the symmetry in the direction as you want with the appropriate buttons. |
|
|
Save/Open rig
|
Use the Save and Open button to save a base helpers or load a base helpers. It is highly recommended to save the base helpers before finalizing a rig, it will quickly regenerate the rig when needed . Namely, the creation of a rig can be paused and resumed at any time. Simply, save the current scene in the state then restart the scene and the script to resume yout work. The auto-rig will automatically resume to the state of the backup to finish the rig. |
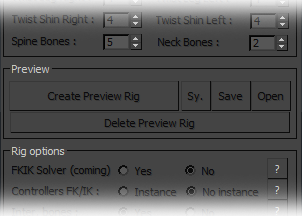
Rig options
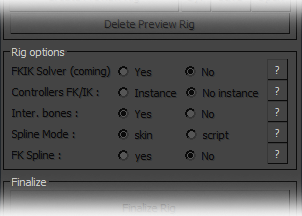 |
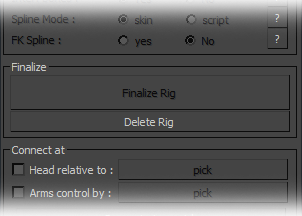
The rig options allows to add or to delete some functions to rig:. |
Controllers FK/IK: in "Instance" mode, the IK/FK control parameters will be added on each animation controller with the advantage of being more faster attainable. In "No body" mode the parameters will be placed only on masters of the member and allows to not mix the animation keys and key IK / FK transitions.
|
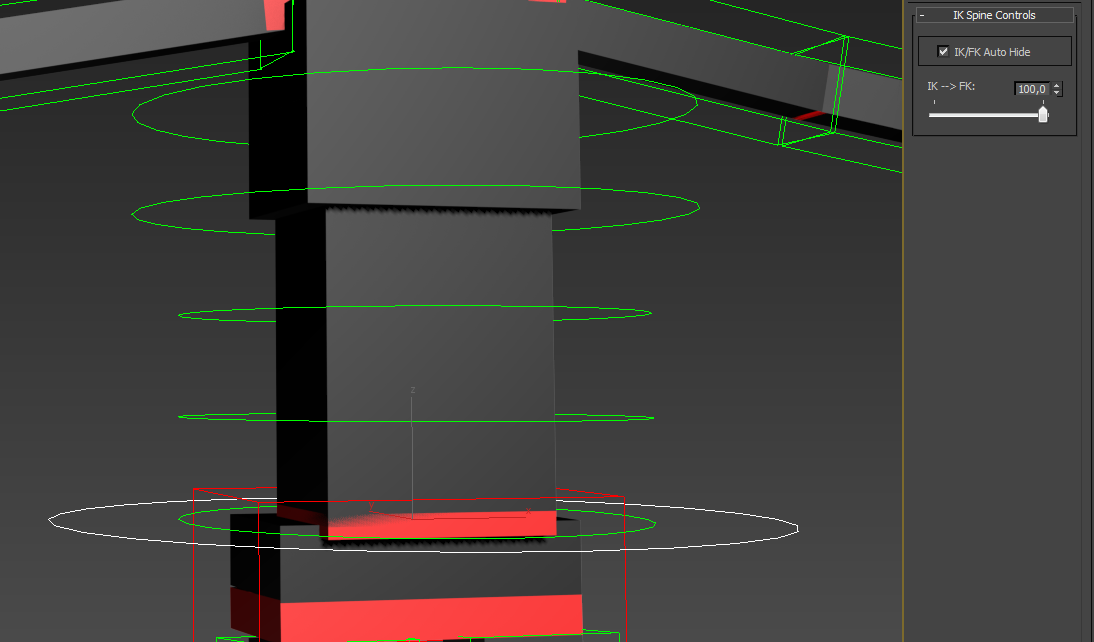
FK Spines: add a FK animation system to the spine.
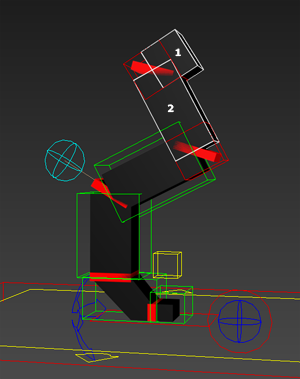
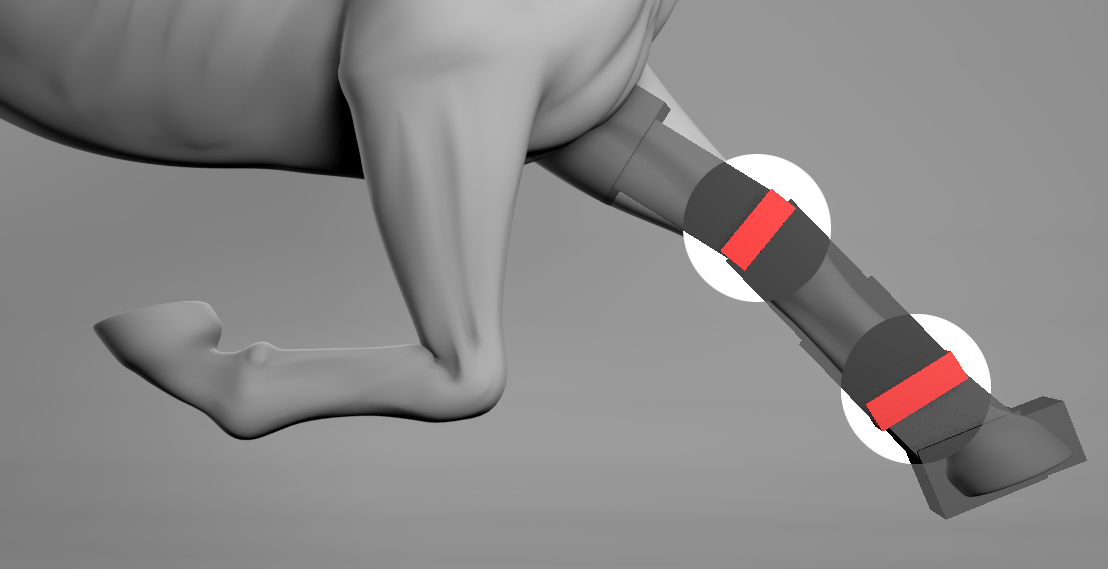
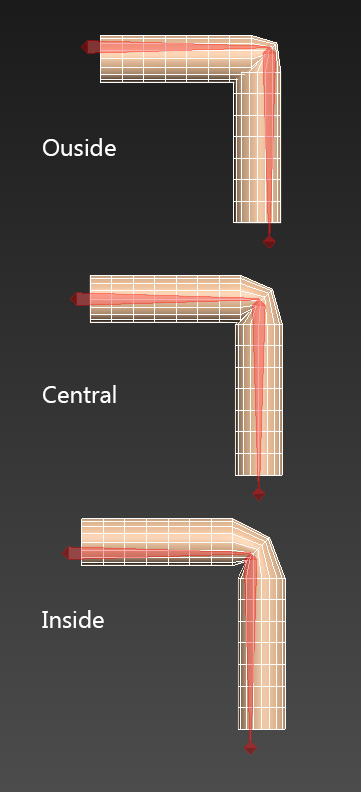
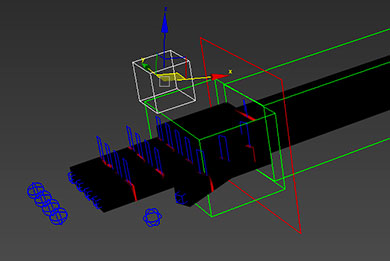
Inter. bones: Intermediate bones can improve skinning in the joints and avoid the use of a maximum skin that quickly morph increasing red scene (see the image below).
|
Finalize
 |
The finalization is the last step in the creation of the rig. The auto-rig will generated the rig depending on the placement of base helpers previously defined. Once the rig finalized it is no longer possible to change the rig without regenerating a new base of helpers. |
|
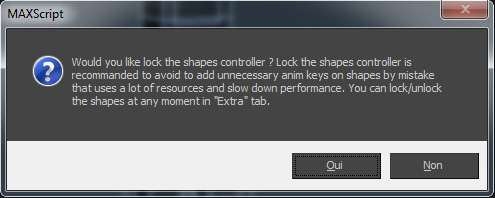
At the end of the finalization, it's possible to lock all the animation controller shapes to avoid to add useless animation keys on them and to slow down the scene. |
Delete rig
|
"Delete rig" to remove a rig easily. With this method, however, it is important to enter the name of the rig in the edit text "Master Name". |
Getting Started
Create a biped rig
1. nammed the rig future.
|
|
2. choose the mode of creation "biped" 3. select the members usefull for the future rig and these numbers. For a standard character, we keep the standard parameters. 4. define the number of digits for the hands and the foots. 5. generate the "Base Helpers", which is a set of marks to guide the auto-rig to build the future rig.
|
6. define the numbers of bones by members. Big values of number of bones increase the precision of twists and curves but speed down the final rig. 4 bones is a good compromise for a standard character.
7. Make a symmetry of your members, look a preview of your future rig and modify it if necessary before the finalisation.
8. define the options as you want.
9. finalize the rig. Enjoy!
Create a quadruped rig
|
|
1. nammed the future rig. 2. choose the creation mode "Quad. II" corresponding to the quadrupeds with 4 members of type legs. 3. The mode "Quad. II" preselected the members necessary to build a standard quadruped (horses, dogs...). Of course, you can then modify the members as you want. 4. define tje number of digits as you want. 5. generate the "Base Helpers", which is a set of marks to guide the auto-rig to build the future rig.
|

6. define the numbers of bones by members. Big values of number of bones increase the precision of twists and curves but speed down the final rig. 4 bones is a good compromise for a standard character.
7. Make a symmetry of your members, look a preview of your future rig and modify it if necessary before the finalisation.
8. define the options of rigging as you want.
9. finalize the rig. Enjoy!
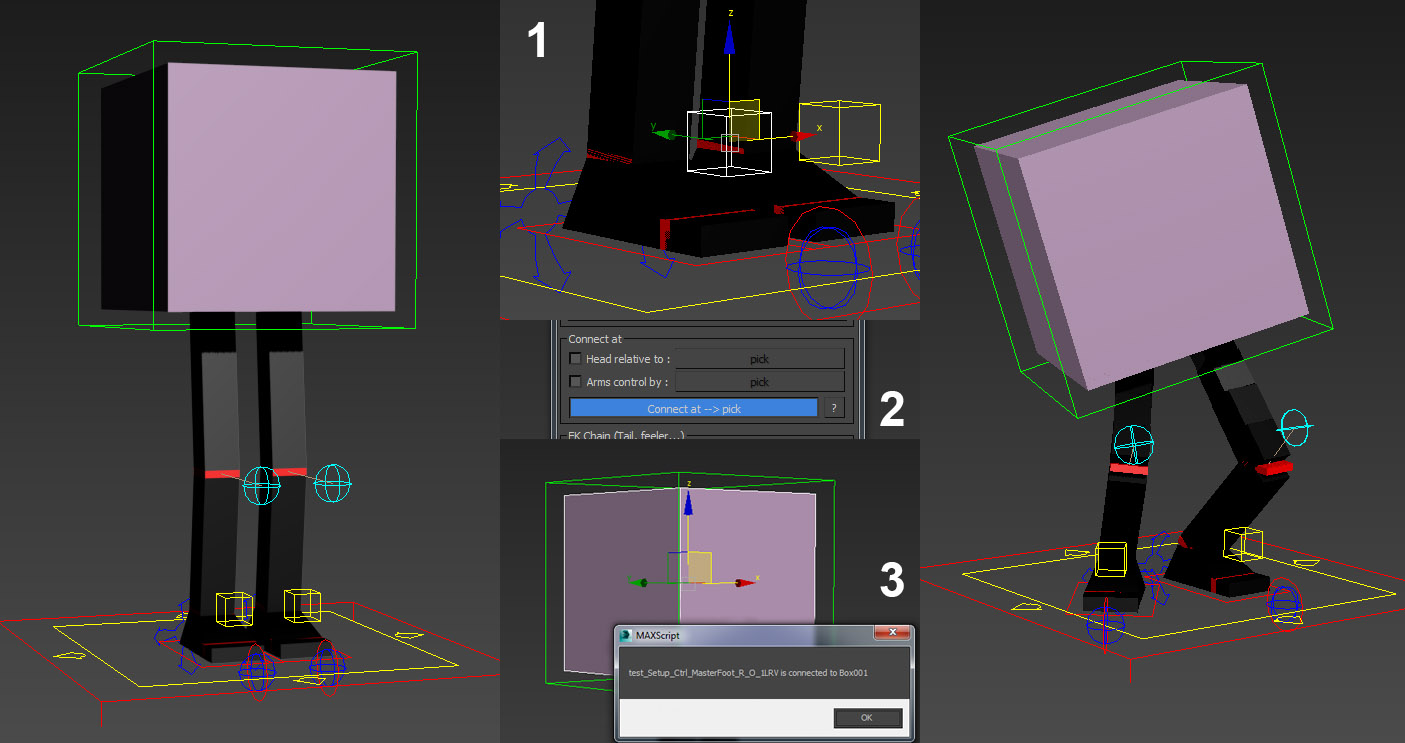
Add members to a rig
Connect at --> pick
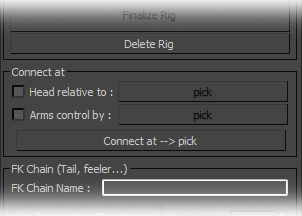 |
In this part, you can define the number of members you want for your future rig. When you generate the rig for the first time, it's necessary to check "Master Control" for create a master general on the rig. When you want to generate just a member, by exemple, to completed a rig already existing, it's not advisable to check this option. |
|
After you create a member or a FK chain, to connect it to the rig, select the main control shape (yellow shape nammed "XXX_Ctrl_MasterXXX"), to press on the button "Connect at --> pick" and pick the object to which you want to connect the member to connect it. Example with a leg :
1. Select the master of the leg. |
Connect head/arms members at...
The rig of the head and of the arms are special because their position and rotation can be independent of the object to which they are linked, in a standard setup the top of the spine.
|
|
To keep this option on the head or the arm that you want to connect to a rig, just check "Head relative to" for the head or "Arms control by" for the arms and select the object with which the head or the arms will be relative in picking it with the corresponding pickbutton.
|

The head or the arms will be conneted to the object picked with the "Connect at --> pick" button but his position and rotation will be relative to the object picked with the pickbutton used previously.
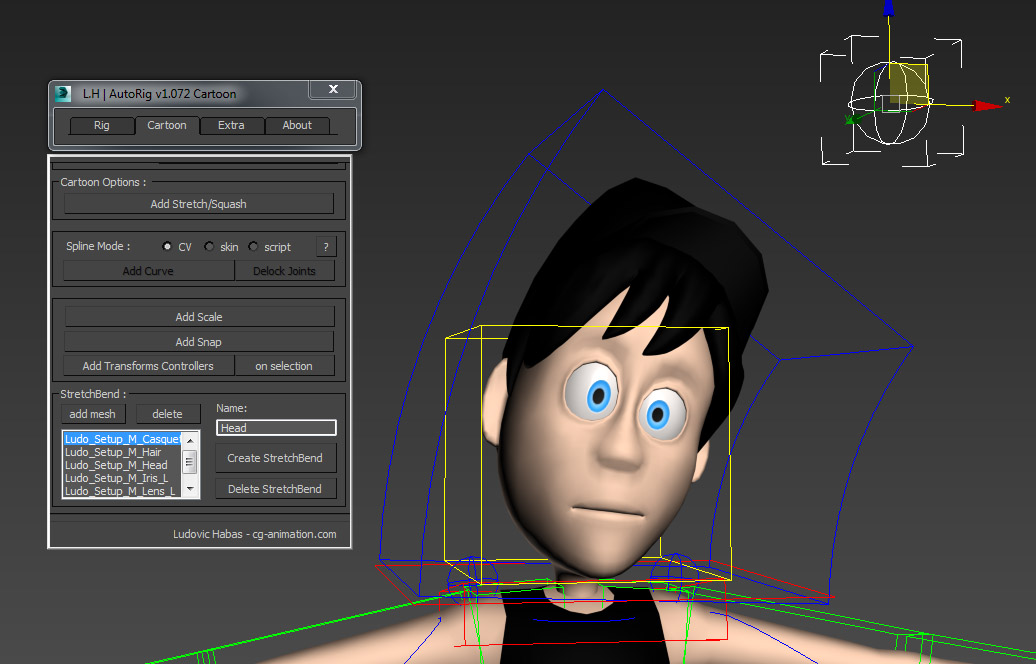
Cartoons options
Initialize
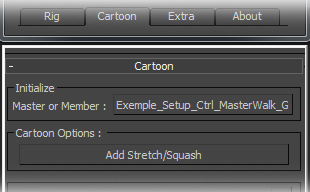 |
To add the "cartoons" options, the auto-rig has need to be initialized. It is possible to add "cartoons" options on a members or on all the rig. To add them on a specify member, pick his master shape. To add them on all the rig, pick the master general of the rig. |
|
|
|
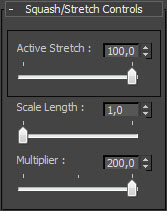
Add stretch/squash
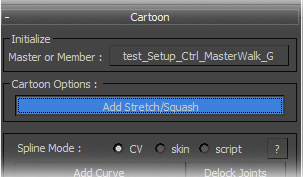 |
|
|
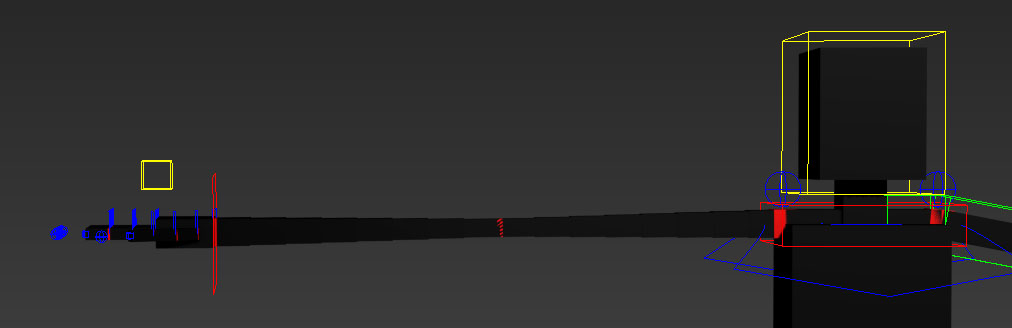
The stretch option allow to strech the members like an elastic. Once the cartoon menu initialize, just press on "Add Strech/Squash" to add the stretch option on the member or rig picked during the initialization. When the stretch option is added, a "Squash/Stretch Controls" menu is available on the master shape of the member or members picked. This menu allow to activate the stretch in IK, or set the stretch in FK and also to set the squash force.
|
Add curves members
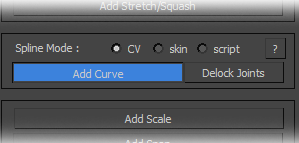 |
|
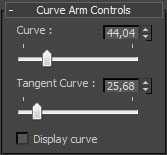
|
The curves options provide the ability to deform the members. Once initialized cartoon menu, simply click on "Add Curve" to add the curve system on the member or the rig picked during initialization. 4 systems of rig for the curves: "Fast CV", "CV", "Skin" and "Script". The system of curves "Fast CV" is the last system of rig, normally it's the most faster and with the better compatibility with different version of 3ds Max. When the curve system is added, a "Curve Controls" menu becomes available on the master shape of control of the member or or members picked. This menu allows you to adjust the value of the curves of the joint member and its tangents value. A checkbox can also display control shapes to customize and animate curves. Adding curves options allows to add "Delock Joints" option. |

Delock Joints
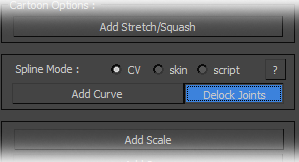 |
Once the cartoon menu initialized and options of curves added, you can add the possibility to animate the position of joints with this options 'Delock joints". |
|
This option will add an animation controller on each joints and the animator will be able to animate them. |
|
Add scale
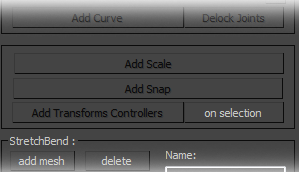 |
|
|
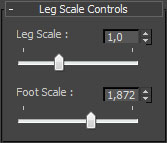
The scale option allow to enlarge or reduce the parts of a member. To add this option, once the auto-rig initialized, just press on "Add scale" to add the scale option on the member or the rig picked during initialization. When the scale system is added, a "Scale Controls" menu is available on the master shape of the member or members picked and allow to set the size of each part of member.
|
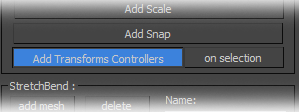
Add snap
|
Once the cartoon menu initialized, just press on "Add Snap" to add the snap system to the member or to the rig initialized. |
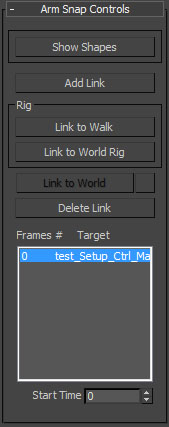 |
When the snap system is added, a "Snap Controls" menu is available on the IK shape on the member or on the members previously selected and allow to link/unlink the IK system of the member selected to any object during the animation. Add link: Link the IK system to the picked object at the current frame. |
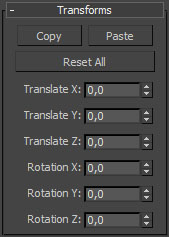
Add "Transforms" options
 |
|
|
The "Transforms" options allow to view the values of transformations (positions and rotations) of the animation shape selected, to copy the values of transformations and paste them on an other animation shape or also to reset quickly the transformations of the animation shape. To add this option, once the auto-rig initialized, just press on "Add Transforms Controllers" to add a "Transforms" menu on the member or the rig picked previously during the initialization. The "Transforms" options can also be added on any personnal object or group of objects previously selected in pressing the "on selection" button. |
Stretch/Bend
 |
|
|
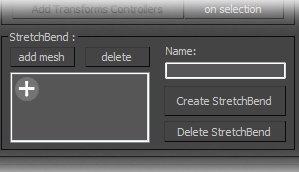
The StretchBend system allows to add on any geometries, even if they are already rigged or have modifiers, etc... an overlay of modifiers to strech, bend and/or twist them.
To add this overlay, the object or the group of objects must be added to the list of the script with the button "add mesh" after selected them. The system must be nammed with an unique name, then can be created with the "Create StretchBend" button. Attention, the "Limit Effect" option is not accessible by script so you should be checked this options by hand to the system work properly. A message recall it before the finalization of system.
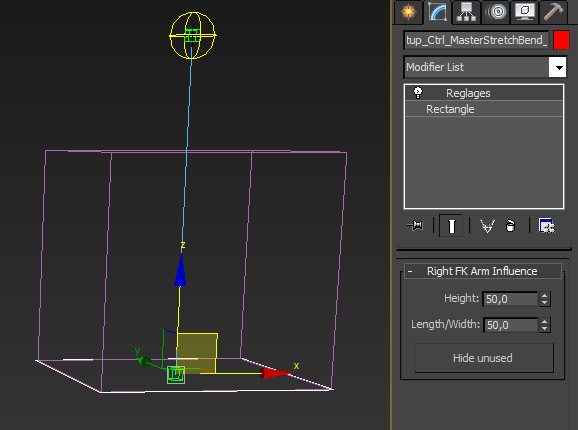
Once created, the box formed by the system must emcompass your object or group of objects to work properly. To set it, use the MasterStretchBend ( red shape created ) to position well the system and play with the values of height and of length/width to adjust its size. |

Extra
Rig colors
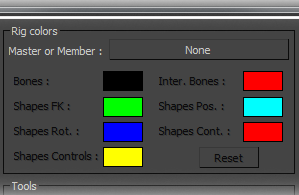 |
The "Rig colors" options are useful to modified the color of the rig. Just select the master of the rig or of the member you want to set. The "reset" button allows to back to the original colors. |
Lock/Unlock the shapes
 |
"Lock selection" and "Unlock selection" allows to locked or unlocked the tracks attributes of any selected object of the rig. It's mainly usefull for the animation controllers to avoid to add useless animation keys when you animate and slow down the scene. |
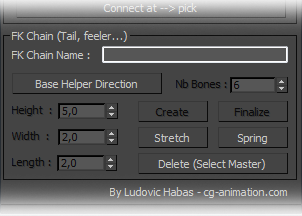
Add a FK Chain
Create a FK chain
 |
The "FK Chain" can quickly create a FK chain to rig a tail, a braid, etc... The FK chain will be able to be linked to the rig or others objects with the section "connect at". |
|
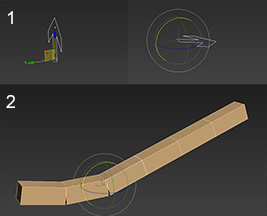
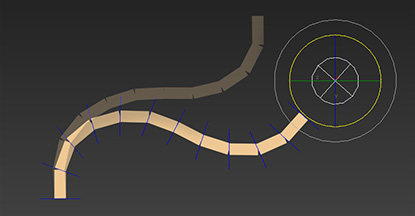
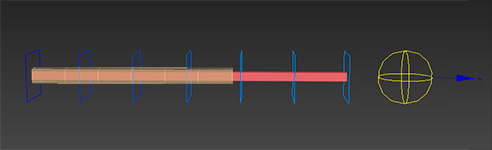
To create a FK chain, you must frist name it. The master name of your chain is defined as the name of a rig.
The "FK Chain name" is the name you want give at your FK chain. Once defined names, the first step is to define the starting position of you FK chain and his main axis with the "Helper Base Direciton" button and the small arrow created (1). Once the axis and the position set with the arrow, a first draft of the FK chain can be created with the "create" button and be set in rotation and position as desired by bones bones. Once your FK chain, it can be finalized with the "Finalize" button and is ready to be animated.
== Connecting an FK chain to a rig == == Stretch == To add the ability to stretcher your FK chain pouvroi to stretch it, select the primary controller of the FK chain (yellow shape named "XXX_Ctrl_MasterXXX") and add the stretch by simply clicking on the "Stretch" button.
== Spring == To add spring option on your FK chain to automatically generate delay in the movement, select the master controller of the FK chain (yellow shape named "XXX_Ctrl_MasterXXX") and add the spring by simply clicking on the button " Spring ". == Symmetry == Coming soon |